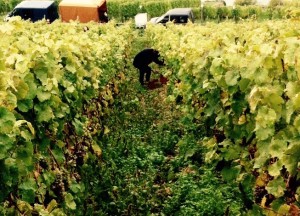
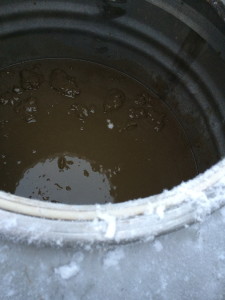
Winemaking may begin with the picking of the grapes in the vineyards, but when the picking is done it’s only the beginning of the work at the winery.

Last Load of Grapes for the Day Arriving
Loads of grapes arrive multiple times a day at the winery. Depending on what time of day the harvest took place, this could be in the wee early hours of the morning or well after dark in the evening. In some location and at some wineries, the grapes are picked during the night when the temperature is the coldest and therefore the grapes remain as stable and healthy as possible. At the winery I work at, we picked during the day and often the last load of grapes wouldn’t arrive to the winery until 9:00pm.
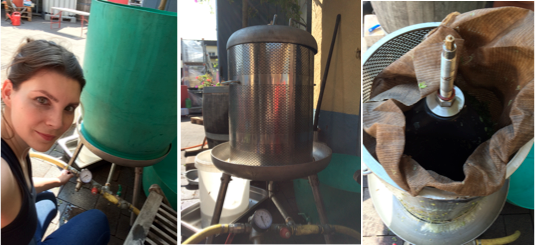
DeStemming
So the grapes have arrived. First things first: are you destemming? If you have machine-harvested the grapes, this has already been done by the machine. Bitter tasting phenols exist in the stems of grapes, and while this can sometimes be desired for red wines, it is avoided with white wines. So into the destemming machine the grapes go. This machine also slightly crushes the grapes, releasing some juice and turning the grapes into “mash”.

Destemming Machine
Macerating
Next, are you macerating the grapes? Maceration is where the grapes (now in mash form) are left in containers to sit “on the skins”. This is particularly important with red wines, as the red colour, as well as flavours, aromas, and tannins, comes from the skins. If you were to press the grapes right away, you would lose these important characteristics.This red skin transfer can also be accomplished by heating the mash. Depending on how long the grapes were left to mingle with the skins, you can end up with a blanc de blanc, weissherbst, or rosé. With certain white grape varietals with very aromatic skins such as Sauvignon Blanc, maceration is also employed. Maceration can happen before, during, and/or after fermentation, depending on the desired outcome. As the mash begins to ferment, the CO2 pushes the grape skins to the top of the container. This can form as cake-like hard layer on the top. Since the point is skin-contact, the wine-maker must “punch” the grapes skins down to mix them.
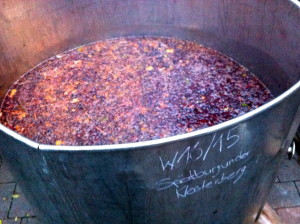
Pinot Noir Macerating
pressing
The next action is to press the grapes (or mash in the case of destemmed or macerated grapes). There are a few different types of pressing machines, however most these days work by applying pneumatic pressure to a ballon inside the machine’s vat and forcing the grapes up against the sides of the vat. The juice then flows out through screens and channels and if pumped into a tank.
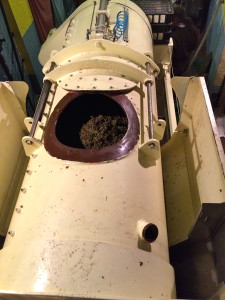
Pressing Machine
clarifying
Ta-da! You have grape juice (now referred to as “must”)! With white wines, before fermentation can occur you need to remove the floating suspended matter in order to turn the natural grey-coloured mash into the crystal clear liquid we expect. Bentonite, charcoal, Kieselgel, Flora Clair, sulfuric acid, and other clarifying products preform this duty. They attract the suspended participles and pull them down to the bottom of the tank. For more information on the clarification process, you can refer to my Clarification blog post.

Clarifying Products
The next step is adding the yeast to begin fermentation and separating the sunken particles from the clarified must. To make this separation, the wine is pumped into a different tank, making sure not to transfer the bottom of the tank containing the settled particles. A second pressing can also occur using the juice from the bottom of the tank mixed with soluble cotton, making sure to squeeze every last drop of grape juice from the clarifying agents and sunken particles. This lower-quality juice is often kept separate from the main juice.
Pressed Must + Clarifying Agents + Settled Particles + Soluble Cotton = Ready for Second Pressing
Fermenting
Fermentation is the process by which yeast eats the sugars in the grape juice and convert the sugars into alcohol and CO2. Either you are kicking it back old school and allowing the naturally occurring yeast on the grape skins and in the air at the winery to ferment your wine, or you are adding a known yeast strain that will optimize the rate of fermentation. If adding yeast, you mix the yeast with warm water, wait for it to activate (as seen in the photo below), and then add it to your must. Fermentation generally starts quickly, but should slow down and continue for a couple weeks losing less and less sugar everyday. If fermentation continues too quickly you can lose a lot of aromas. When the alcohol content of the wine reaches about 15 percent, the yeast dies. You can also stop the fermentation process yourself before the yeast has finished eating (thus leaving residual sugars) by cooling the wine down and/or adding sulfur. These decisions are up to the winemaker.
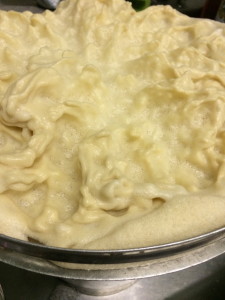
Yeast Getting Into Action Before Being Added to the Must
Carbonic maceration is another fermentation option that is used to create really fruity wines such as Beaujolais. In this case the entire grape bunches are put in tanks without being punctured and without yeast being added. Fermentation then occurs within each berry separately and the natural weight of the grape bunches and gravity press the grapes.
chaptalizing & de-acidifying
Further decision the winemaker must make are whether or not to chaptalize or de-acidify the wine. Chaptalization is the process of adding sugar to the wine (before or during fermentation) to increase the alcohol content of the wine. *This does not increase the residual sugars in the wine.* Chaptalization is done in northern wine growing regions/countries such as Germany who don’t get enough sunshine and therefore have grapes with low-sugar. Not enough natural sugar = too low alcohol percentage in the final product. This is not allowed in every country, or with all quality levels of wines. In Germany, if a wine has the acid and sugar levels to qualify as a Grosse Gewachs (equivalent to “Premier Cru”), you are not allowed to chaptalize or de-acidify.

Adding Sugar
Another outcome of grapes grown in northern climates such as Germany is high acid contents. Not enough sun means that the sugars don’t develop enough and the juices pressed from these grapes have much too high acid levels. High acid content is more palatable (and to an extent sought after) in certain white wines, such as Riesling. High acids in red wines are avoided as it exaggerates astringency. De-acidifying is the process of adding certain chemicals to remove the acid. The options are to use 2 different salt compounds: calcium carbonate and/or potassium hydrogencarbonate; or malolactic fermentation. Malolactic fermentation is the process by which harsh malic acid is transformed into soft lactic acid. De-acidification should occur prior to fermentation in order to maintain harmonious aroma compounds.
Measuring & Tasting
Cellar tastings are an important aspect of the wine-making process. Faults in the wine can be discovered and rectified. Aging and cuvée decisions can be made. Frequent measurements of the wine tells you when fermentation has stopped (and whether you need to try and re-start it or or not) by analyzing the remaining sugar levels. Newly fermenting wines have their own unique aromas and flavours; nothing but a hint of the finished product exists. The fresh fermenting wines taste more like grape juice, with flavours of juicy, sweet fresh fruits such as pineapples and peach. Now you have a cellar full of wines-in-the-making, the fruits of the harvest labour.

Cellar Tasting