Making Bubbly

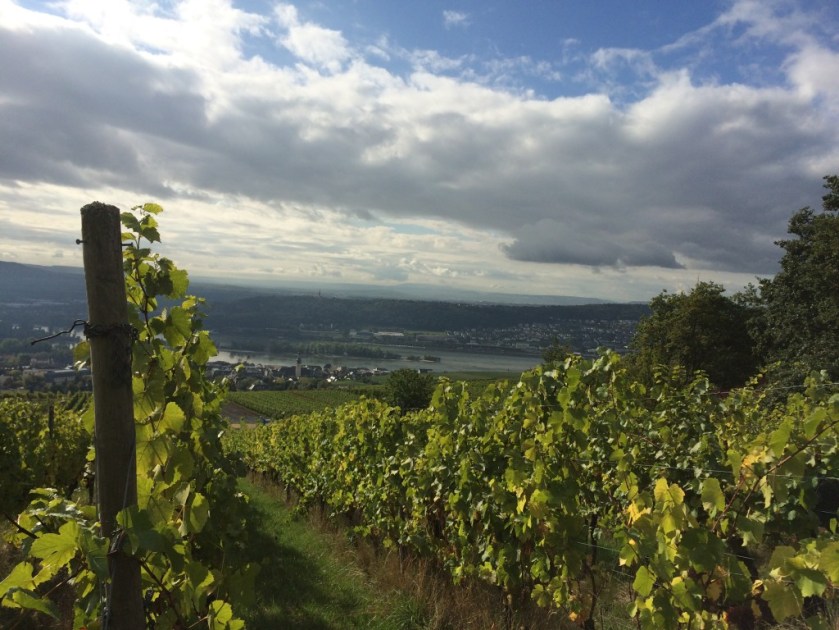
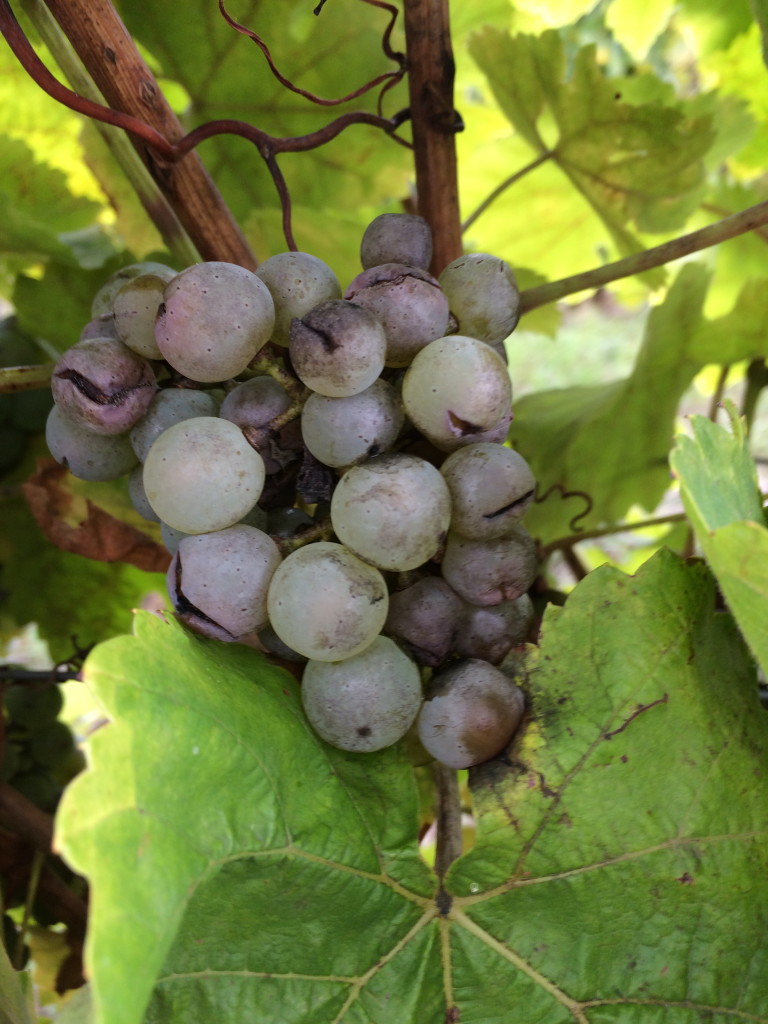
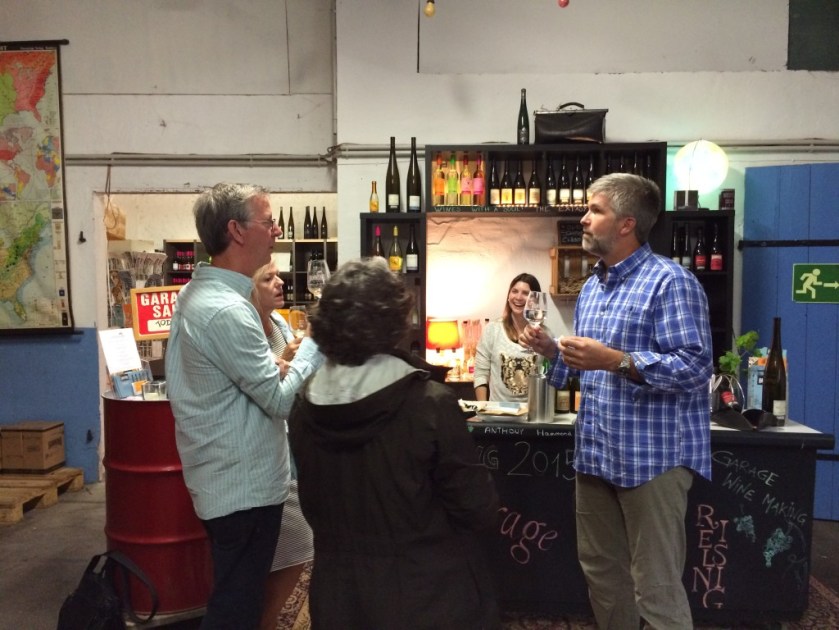
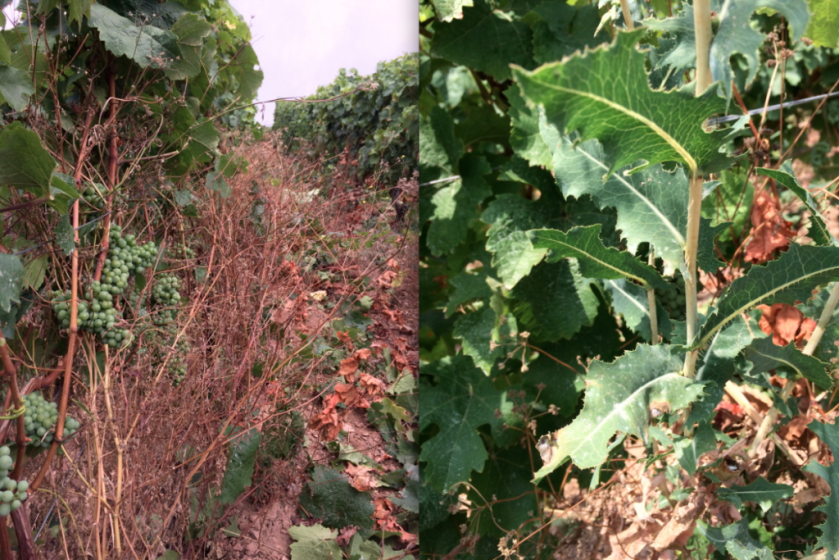
A few weeks ago I harvested a small number of Müller-Thurgau grapes, pressed them, and clarified and fermented the juice. The question then was to leave it as is, or to go through a second fermentation and make sparkling wine. In the spirit of experimentation and education, I chose to make bubbly!

In order to add the bubbles naturally (versus making a secco where carbon dioxide is simply added to wine), a second round of yeast and sugar is added to the wine, and the bottles are then capped and cellared to be left on the yeast.

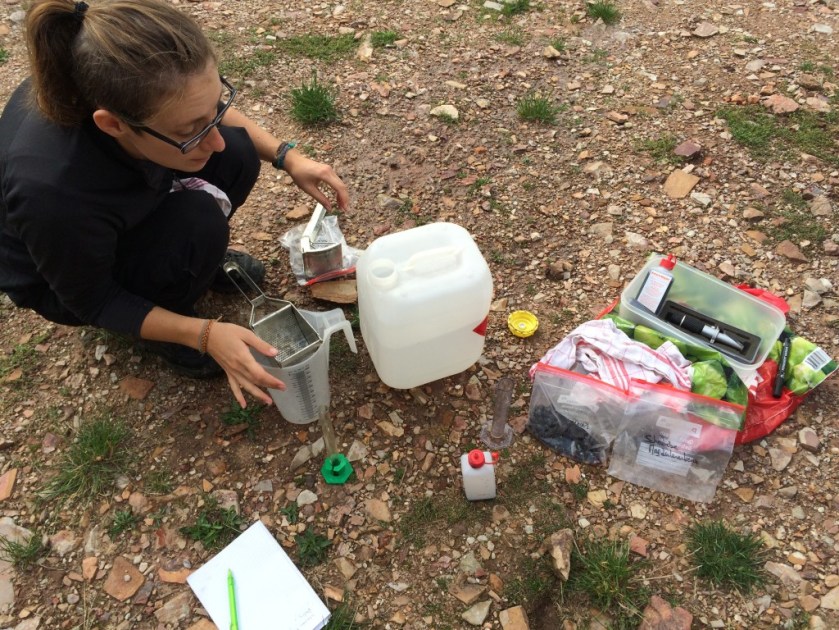
Prior to fermentation, the juice had 77ºOechsle (total sugars), which equates to an expected alcohol level of about 10.3%. Using the handy dandy table below, we can see that this means there is 81g of alcohol/L. When making sparkling wine, one can legally add only 1.5% alcohol. 10.3 + 1.5 = 11.8. This means we are enriching just under 12g of total alcohol with sugar for this second fermentation. We must therefore add 2.93kg/100L, or 0.0293kg/1L of sugar to the wine.

IMG_1744-768x1024
Handy dandy table used to convert units

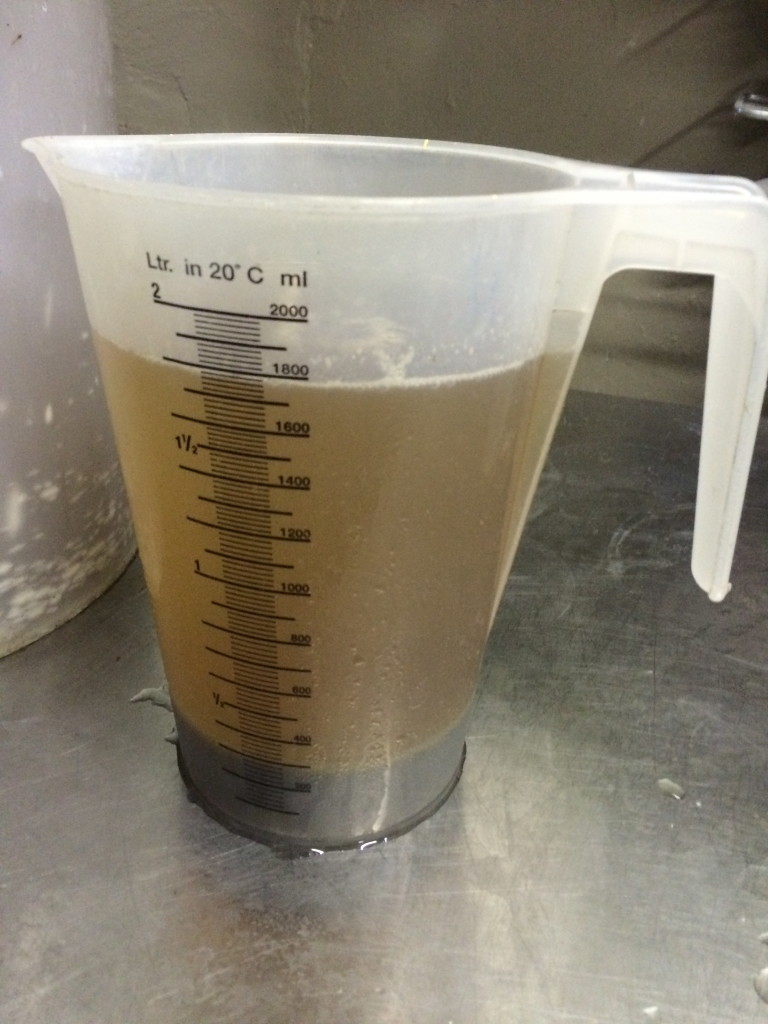
We had 17.5L of wine, so 0.0293kg x 17.5L = 0.512kg. Grams are easier to work with, so 0.512 x 1000 = 512g of sugar needed to be added the 17.5L of wine.

A strain of Sekt yeast was also then added. The rule for this yeast was 20g yeast/100L liquid, or 0.2g/L/1L x 17.5L of wine = 3.5g yeast to be added.

Another thing to note is that the newly fermented wine was stinky. That’s right, really, really stinky. This is a common problem with wine and occurs when the yeast doesn’t have enough sugar to eat. When this happens, the yeast starts eating amino acids – some of which contain sulfur – and produces this farty smell. The way to combat this during the fermentation process is to add nutrients for the yeast to eat. We had done this, but alas we had really hungry yeast. After fermentation, the way to correct this smell is through aeration and copper. We did this and also again added additional nutrients.

IMG_1929-e1443430474798-1024x959
Sterilizing the bottles with sulfur

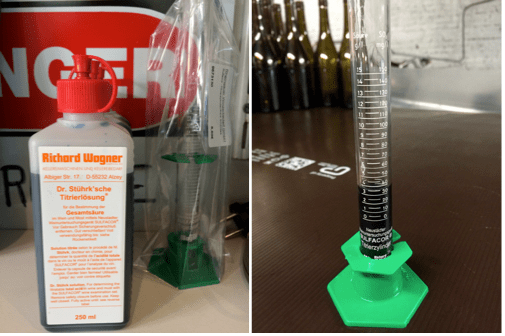
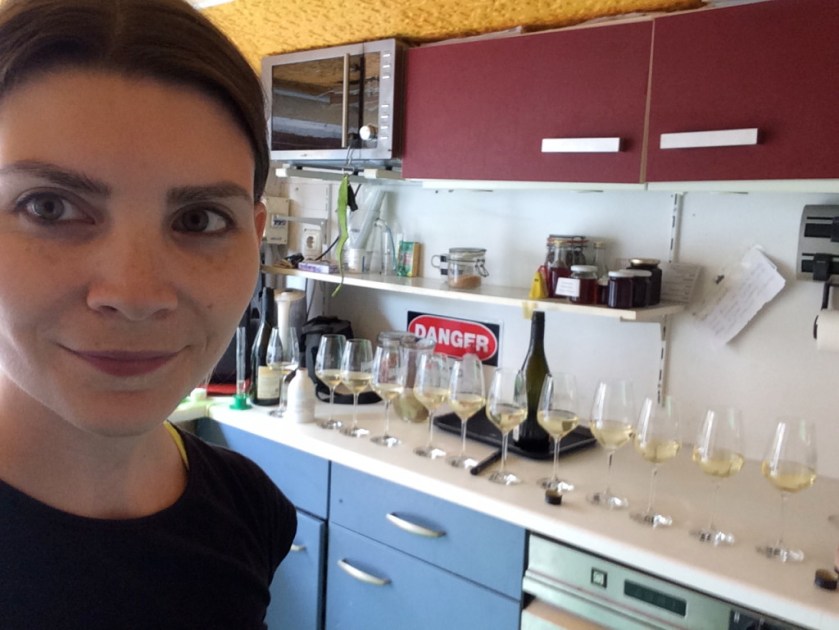
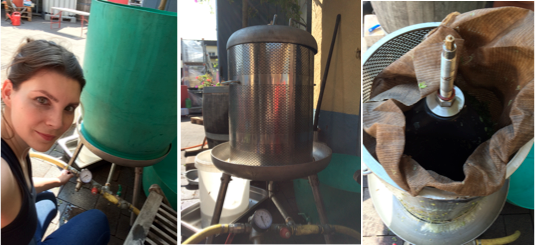
The next step is to bottle and cap the soon-to-be Sekt. The bottles must first be sterilized. To do this, a sulfur-water solution is sprayed into the bottles. The bottles are then 95% filled with the wine and sealed with a bottle cap.

IMG_1931-1024x768
Enter a caption

Sparkling wine bottles are thicker and stronger than standard wine bottles in order to hold up to the carbon dioxide pressure. Even with these specially designed bottles, you can only have 7.5 bars of pressure within the bottle. Doing our due diligence, we checked this. You get 0.47g of CO2/1g fermentable sugar (and 0.46g alcohol). We had added 512g of sugar. 512g x 17.5L = 29.25. 29.25 x 0.47 = 13.75g CO2. Using a specific table, this equaled exactly 7.5 bars of pressures. Phew!

Finally, the bottles are placed on their sides in a cool, dark place. The amount of time the now sparkling wine remains aging on the yeast cells differs according to country, quality level, and desired flavours. For this experimental wine we plan on only waiting for a minimum of 3 months. With this 3 month wait-time, in December the spent yeast cells will be removed through a process called degorgement, corks inserted, and I will be able to cheers to the new year with my very own bubbly!

Science in the Vineyards

As the harvest draws nearer and nearer, a close eye is kept on the acid and sugar levels in the grapes. The longer we wait, the lower the acid and higher the sugar levels become. Some grape varietals such as Gewürztraminer ripen earlier and is therefore harvested earlier. High acidity is preferred for sparkling wine, so those grapes are harvested before sugar levels get too high. In general, however, we need some steady, mild heat and sunshine in the home stretch.

IMG_1979-1024x768
Sun or storms?

Unfortunately, the past couple weeks have been cold and rainy. This is not too good for this critical time in the grapes’ ripening. Too much rain at this time and the grapes become watery. After the storms we had, some of the grapes were damaged. The skins had been punctured, the pulp exposed, and bacteria invaded.

IMG_1988-768x1024
Damaged grapes

Other ways in which grapes become infected is though Oidium – a powdery fungus that develops on the grapes. This is usually dealt with early in the season by spraying sulfur or other fungicides on the vines.  Another fungus that can develop is called Botrytis. Botrytis can in fact be a sought after mold – one that is made into delicious sweet wines. This is referred to a “noble rot”. In this situation, humid conditions are followed by dry conditions. The fungus removes water from the berries, concentrating the sugars. However, other mold and mildew can also form that are undesired and dangerous to the crop yield.

IMG_1956-768x1024
Good mold or bad mold?

It is important to inspect the vineyards frequently this close to the harvest. If sugar and acid levels aren’t perfect, but infection is quickly setting in, you might decide to pick the remaining healthy grapes early.

100 Berry Test

Aside from generally looking at the health of the grapes, a “100 berry” test is done out in the fields to roughly determine the sugar and acid levels. Approximately 100 grapes of one particular varietal are selected at random point all over grape bunches throughout the entire vineyard. Some from the bottom of the bunch, some from the top, some from the front, and some from the back. All over. These grapes are then pressed and the juices analyzed.

IMG_1995-768x1024
Pressing the grapes in the field

A refractometer is used to measure the sugar levels. In Germany we use the unit of measurement called Oechsle (in English: Brix). The acid levels are measured by adding a sodium hydroxide liquid to the juice. When the grape juice turns blue, you have the acid level reading. This process does not take many instruments or materials, so a quick analysis in the field is possible.

IMG_1996-1024x768
Taking readings in the field

The grapes we were looking at (Pinot Noir, Auxerrois, Scheurebe, and Riesling) all showed higher acid levels and lower sugar levels than desired. The outcome? It is clear that these grapes must be left on the vines for a couple weeks longer. Soon, however, the harvest will begin.

Last Minute Alterations

On the verge of the harvest season, it’s out with the old and in with the new! Wine, that is. As we make way for the incoming 2015 grapes to be pressed and cellared, the remaining 2014 wines need to be bottled. Wine makers work all year to grow the grapes, and at minimum they spend a year in the cellar. Clarifying agents have been added. Wine varietals mixed. Acid levels, temperature, residual sugar, and alcohol levels all closely monitored. These two long years result in one final product. So it makes sense that the final moments before sealing the golden juice into bottles are crucial.

First off, how do you know what last minute alternations need to be made? Sulfur levels are easy to determine. You fill the test tube up to the “0” level with the wine, add a sulfur detecting solution seen in the photo below until the wine turns blue, and presto you know how much sulfur you have and therefore how much more needs to be added. Ideally you want to end up with about 35g/L. You lose some in the bottle, so you want to have about 40(ish)g/L just before bottling.

Screen-shot-2015-10-06-at-8.18.07-AM
Detecting sulfur levels

What about the nuances of taste and feeling that scientific instruments can’t detect? For that you need good old fashion taste buds! For example, adding sweet wine reserve or grape juice can help balance overly acidic wines. Say you have a dry wine with no residual sugar and you know you want to end up with somewhere between 4g-8g residual sugar per litre to enhance the flavour. You take 96ml, 97ml, and 98ml of wine in 3 separate glasses, and add 4ml, 3ml, and 2ml of grape juice to each glass, respectively. Now comes the tasting. What tastes the best? Are flavours and aromas lost or enhanced with different sugar levels? It’s the winemaker’s decision.

IMG_1816-1024x768
Trial time!

There are other last minute additions as well, including adding Arabic Gum (a stabilizing agent found in more products than you would believe). This wonder-product can create a smoother, rounder, fuller mouth feel in wines. And yes, all these alternations have laws guiding quantities, and proper paperwork must always be in order.

Into the tanks and barrels with the wine these last minute additions go.

Next stop – bottling!

Mini Harvest – picking, pressing, clarifying, fermenting

Today, I went through the entire process of collecting grape bunches, separating the good grapes from the bad, pressing, clarifying, and starting the fermentation process. What a crash course for the harvest season!

The winery that I work at has a small amount of grapes vines directly on the property itself. These grapes have been attracting unwanted wasps for the past weeks, so it was time to take them down and make wine!  Let me tell you, it takes nerves of steel and a very zen head-space to remain calm while cutting grapes off vines surrounded by wasps. Surprisingly, I did not get stung once. Not even close. I am a zen master.

After the grapes were cut off the vines, I went through the time-consuming process of cutting out bad, vinegary, blackened, unwanted sections of grapes on the bunches.

Screen-shot-2015-09-01-at-10.32.55-PM
Separating the good from the bad

I then took the grapes and was shown how to press them. First we used a traditional press. This was a very lengthy process, requiring time for gravity and pressure to press the juices from the grapes, through the cloth, and out of the filter. I couldn’t believe the dirty grey/brown looking colour of the juice that came out! A degree of murkiness is necessary to give the yeast something to eat and something to hold on to.

IMG_1691-768x1024
Traditional press
IMG_1692-e1441139751708-873x1024
Colour of the must

We then switched to a hydraulic press. This went much faster and we were able to press three times. This press works through water pressure. The cylindrical tub is filled with the grapes, then a balloon in the center of the machine is filled with high-pressure water, pressing the grapes against the tub, through the cloth filter and out of the machine.

Screen-shot-2015-09-01-at-10.37.54-PM
Hydraulic press

After each press, the grapes (or what’s left of them) are moved and stirred by hand. By the third press, grape seeds started to come out of the machine!

When the pressing was done, we measured the sugar and acid levels of the must. Our readings were:

  • 79 Oechsle after first press
  • 77 Oechsle after third press (after the smaller, more acidic grapes are pressed)
  • 5 Acid level
  • 15L must

Then we added the clarifying agents:

  • 7-8g charcoal (5-10% charcoal/ estimated 5-10% rot)
  • 15g Bentonit (50/150g/ 100L)
  • 3g Floral Clair (10-20g? 100L)
  • 8ml Kieselsol (30-100ml/ 100L)
IMG_1703-e1441140864601-1024x544
Clarifying products used

Then it was time to ferment. A Riesling strain of yeast was added to 1 litre water and 1 litre wine. Because the juice was so cold, we left the yeast to begin the fermentation process in the small glass until the larger container warmed up, at which point the contents of the small container were added to the entire 15 litres of must.

Screen-shot-2015-09-01-at-10.40.59-PM
Starting the fermentation

Now each day I must check the sugar level and the temperature of the fermenting wine. I write my findings on a graph and track the changes. Updates to come.

(Also, apologies for mixing German and English terminology. It’s strange learning something new for the first time in a foreign language-I don’t even know some of these terms in English!)

Filtering

Before the filtering process can even begin, it is important to clean all equipment and machines. This includes all hoses, filters, and tanks. I spend some time cleaning 2 different filters. One is a cylindrical Kieselgur filter with layers of mesh screens, and the other is a rectangular Celluflux filter with metal slots that special paper-type “becopad” sheets are placed on.

Screen-shot-2015-09-01-at-10.15.59-PM
Kieselgur filter used

This week we are filtering 3 wines: Auxerrois, Weissburgunder, and Grauburgunder. On the day of filtering, we use the Kieselgur filter. The filtering process happens 4 times using 4 different grades of cellulose powder. Each time a finer power is added to the slurry of wine and forced through the metal screens that then filter out the unwanted particles. Between the second and third filter the difference in the colour and clarity of the wine is clear!

IMG_1532-768x1024
Wine between 2nd and 3rd filtering

The wines are pumped from one tank, through the filtering machine, to another tank. This goes back and forth 4 times during this day of filtering. The wines then go back into the cellar. When it is time to bottle the wines, they will be filtered once more as they go from cellar to tank, then again as they are bottled.

IMG_1531-768x1024
Tank being pumped

Rheingau Wine Festival

For 10 days each year, my fair German town of Wiesbaden plays host to over 100 wineries from the Rheingau area of Germany. It is a spectacular sight, with over 400,000 people visiting over the 10 days, and an even more spectacular experience. This year was the 40th anniversary celebration, and my fourth festival, and it really never gets old. You eat, you drink, you wait in human traffic jams to get from one side of the festival to the other, you have another glass of Riesling. Life is good.

IMG_17101-1024x768
Over 100 wine stands

This year I went into the festival armed with more wine-knowledge than ever before. Yes, Rieslings are everywhere. Dry, half dry, semi sweet, sweet, sparkling. All the Rieslings of the rainbow. But what about Mueller Thurgau, and German Pinot Blanc, Gris and Noir? I needed to try those. And what were these Weissherbst and Blanc de Noir wine on the menus? At 2-3 Euros per 0.1ml glass, you don’t go broke giving them all a shot. It was both a great wine education and a grand party.

IMG_16761-1024x768
Winefest at dusk

So let me tell you quickly some things that I learned:

1) Mueller Thurgau – a grape varietal invented in 1882 by a Swiss man at Geisenheim University, the well-known wine institute in the area – tastes quite a bit like a Sauvignon Blanc. It has a floral and vegetal nose and flavour, but is less harsh than some, more like a smooth, soft New Zealand Sauvignon Blanc.

2) Weissherbst and Blanc de Noir are the same thing (German and French christening). They can only be a varietal wine (meaning, be made only from one type of grape), and in this area at least, they come from the Pinot Noir grape. The wine produced is very light pink in colour. To achieve this, the grapes are gently pressed and the skins are quickly removed afterward. They do not in any way taste like a traditional red Pinot Noir. They differ from traditional Rosés because red wine can be added to Rosés to change the colour and flavour. I was familiar with Blanc de Blanc and Blanc de Noir Champagnes, but not in wine-form. See, Winefest is educational! Hoorah!

3) I discovered the best gosh darn German Pinot Noir in nearly three years living here. Hallelujah! Barrel aged in American and French oak for 26 months, this is a big, bold, smoky red. The only qualm I have with it is that no matter how deliciously luxurious it is, I do not find it reminiscent of a typical Pinot Noir. It has lost all varietal character. Pinot Noirs tend to be light, sour, a little spicy and earthy, and taste of red fruits. No matter – it’s tasty!

IMG_16671
Winzer von Erbach Pinot Noir

To many people, this festival is the highlight of the summer festival season (and, admittedly, we take ownership and call it the “Wiesbaden Winefest”). They fill the glasses high and there’s something here for every wine lover.

Behind the Counter – Wine Tasting

Introducing people to wine you are proud of is the rewarding finale to the year-long-plus of work you know went into making every drop of the good-stuff. With so many wines out there to choose from, when you can share stories behind the wine and the wine making process it adds a level of personal affiliation that connects customers to the wine.

IMG_1655-1024x768
Lively wine discussions

Last week I had the pleasure of leading a wine tasting with some friends from out of town (well, out of country). It was a blast! Here was the count:

  • 2 Seccos
  • 1 Sekt
  • 1 Weissburgunder
  • 1 Grauburgunder
  • 1 Auxerrois
  • 1 Riesling trocken
  • 1 Riesling Kabinett mild
  • 1 Riesling Spätlese mild
  • 1 Spontaneously fermented Riesling Spätlese feinherb
IMG_1594-e1440450733346-1024x417
So many options!

Now, with serious wine tasters, a wine evaluation starts with an assessment of colour, hue, and consistency, then aroma, then the flavour and mouth feel, and finally the finish.

When ascertaining whether a wine is great or not, tasters look for qualities based on the following criteria:

Varietal character: how much the wine represents the grape it comes from

Integration: how well all elements of the wine fuse together harmoniously

Expressiveness: how clearly defined and focused the aromas and flavours of the wine are

Complexity: that intriguing force that pulls you to the wine, sip after sip

Connectedness: how well the wine embodies the land and environment it comes from

This high-level evaluation is certainly not necessary if the point of visiting a winery is simply curiosity and the search for tasty, drinkable wine. However, it is always nice when people feel open to talk about the wine, the flavours, food pairing ideas, etc. This communication makes a tasting a much more interactive and exciting exchange.

In the end, nothing can beat pouring tasting after tasting, telling a story through the order of the wines, engaging in bright conversation, and enjoying a jolly, joyous wine-fueled atmosphere with friends and wine enthusiasts.

Clarifying

The clarification of wine must (juice) works through positive and negative electrical charges or through absorption in order to drag suspended particles down to the bottom of tanks to settle. Various products are used before filtration, during filtration, or just before bottling. Attention! Too much filtration can strip the wine of its flavour and character.

Screen-shot-2015-08-15-at-12.59.27-PM-e1453401527489-251x300
Sediment in tank

The following are brief descriptions of the clarifying products that I have seen used:

Bentonite (negative charge) is added to remove large particles. It comes as a powder-clay consisting of calcium and sodium. After being mixed with water, the slurry is added to the wine. The bentonite chemicals react to the protein elements in the wine (mainly dead yeast), bonding to them, making them heavy, and dragging the now large particles down to the bottom of the tank. The riper the grape, the more bentonite is required.

Activated charcoal (neutral charge) absorbs bad odors and browning colours caused by oxidization.

Silicagel/Kieselgel (negative charge) removed bitterness from wine and clears out haze. It is most commonly used in combination with gelatin.

Egg Whites (positive charge) or the technical term for the protein found in egg whites, Albumin, is used to reduce astringency and decrease spoilage. It is often used in red wines as it doesn’t react with the tannins and also keeps the red colour intact. You can quite literally use the whites of eggs separated from the yolk, but powder form is safer as you reduce the risk of bacteria contamination.

Flora Clair (positive charge) is derived from plant proteins. It is also a gelatin replacement and thus when used can make the wine, technically speaking, vegan.

Sulfuric acid is added to reduce the affect of Acetaldehyde in wine. Acetaldehyde is a naturally occurring organic chemical compound and a by-product of yeast fermentation. It produces a butter-like smell and can cause wine spoilage. Adding sulfuric acid to wine can protect against this. It is a preservative, antibacterial and antioxidant. Sulfites are found naturally in fruits (and thus wine). Therefore, even wines proclaimed to be “sulfite-free” do contain the chemical, it’s just not deliberately added. Fun fact: dried fruits contain much higher quantities of sulfites than wine. Unsurprisingly, sulfite-free wines retain this peculiar scent to some degree.

IMG_1743-768x1024
Example of visible separation

Dangers in the field

As a gal who spent a summer planting trees in Canada, I’m prepared for uneven terrain, bugs, the natural elements, and the physical labour. I’ve got my sturdy hiking boots, gardening/work gloves, sunscreen, a hat, water, and no matter how hot it is I NEVER WEAR SHORTS. Nope. It’s just not worth it. While there is no fear of bears, or moose, or black flies here in the vineyards, there are twigs and bushes and thorns and rogue vines and, well, nature, galore.

Screen-shot-2015-08-14-at-7.41.16-PM-1024x683
Exhibit A: Battling prickly scrub and thorns.

Why are the rows not cleared of this brush, you ask? Yes, some are, but many are not for the same reason that these vines must be worked by hand. Two words: steep slopes. While sloping vineyards produce notoriously great wine due to the sun exposure, working at a 33-degree incline can be a little, shall I say, lopsided. Spending the entire time pulling leaves off of only one side of the vines (see article “First Days in the Field”), you end up a wee bit slanty (as well as with an uneven suntan—cough! sunburn). On the bright side, every day I feel stronger, and every day it gets a little easier. Just watch that you don’t take your newly developing sense of the all mighty vineyard power out on the growing grapes.

Screen-shot-2015-08-14-at-7.37.38-PM-1024x636
Exhibit B: Burrs. Everywhere.

Gear is also important. The boots I wear have been fantastic! My favourite feature is the low back on the boots. It really makes walking on steep slopes more comfortable. In harvest season I will wear waterproof, steel-toe boots. However, even though the boots give me stability, and the gloves I wear protect me from most cuts (as well as give a psychological sense of fearlessness), it seems that blisters are inevitable.

Lastly, as one prone to daily sun sneezes, I have to imagine that allergies would be a nightmare out in the fields. At least it wouldn’t be an allergy to wine itself that stops you from enjoying a well-deserved glass of at the end of a hard day’s work.

Pinot Blanc vs. Pinot Gris

It’s always interesting to compare two wines side-by-side.

Here we have a 2011 dry Grauer Burgunder (pinot gris) and a 2012 dry Weiβer Burgunder (pinot blanc) from the winery Martin Waβmer from the German state of Baden.

According to their website, they often use “wild” (naturally occurring) yeast for fermentation.

Our wines are brought to fermentation almost exclusively in a “dry” process, wherever possible with their own natural yeast, and are left to ferment for longer than is normal, before maturing according to the age-old tradition of Burgunder wines. (http://www.weingut-wassmer.de/)

Grauer Burgunder: Orange tinted colour. Slate, minerality, rose petals, earthy. Not much acidity, a mild pop of citrus and orange peel. On it’s own this wine is lacklustre, bland, and quite thin and watery. Paired with salty and fatty foods however, and this wine really develops rounder, more complex flavours. Try it with sausages, potatoes, garlic bread, and salty cheese.

Weiβer Burgunder: Green tinted colour. Bright, citrus punch. Refreshing and clean. Nice balance of acidity and sweetness, with a hint of minerality. This wine can be paired with so many “simple” foods, or enjoyed on its own.